Please
note: In FSX hit the ‘V’ key to take a screenshot. The screenshot will
appear in My Documents/My Pictures/Flight Simulator X Files.
Thanks to Fred ‘mulletman’ Clark for the great tutorial.

|
|
Hello All.
I
am a member of several forums, some of which have screenshot sections.
As this is one of my favourite parts of flight simming, sharing your
setup with others, I thought I would answer a question that it
regularly posted. "How do you do it?"
I would like to warn
everyone, that it is highly addictive. Once you get the hang of it, you
will not stop. I took my first screenshot a long, long time ago, and
since then I have improved dramatically, not only in the quality of the
shot, but the visual aspects of my simulation.
So here is my
guide to sharing an image with others. I would like to point out that
this is about as basic as it gets. I’m only going to tell you how to
capture the image, save it, and then post it online.
Editing shots is a popular area, but I don’t intend to tell you how to do it. This would only make this tutorial a small book.
Naturally this method will not only work with flight sim, but almost every other program on a computer.
Please
note that this is my preferred method. It isn’t short, but it isn’t
long either. There are a few other ways, using other programs, but in
terms of having a raw image to play with, I like this one. Also, all
images are in 800x600 size, for those with smaller monitors. But all
important is on screen. Of course you only have to use what is referred
to. Ignore the minimised stuff.
The shots are resized, and
therefore are not best quality, but they are readable. If anyone has
better quality images, (preferably with the same image) then email them
to me at the address listed with the links below. Also, on the subject
of these links, this was written with the intention of being posted on
several forums. Therefore I have linked to all websites, including the
one you may already be on!
Right then.
First of all we have to capture the image. So fire up Flight Sim, and load a flight.
One
you have it up and running, hit the key on your keyboard marked 'Print
Screen'. You may have another button called F-Lock. This can cause
interference and stop this button working, if you do, the F-Lock light
should be OUT for you to be able to capture.
Minimise, or close
flight sim. It doesn’t matter. At the moment you currently have an
image temporarily saved in your computers RAM. If you decide to use the
copy feature on anything, shut down the PC, or hit print screen again,
the image will be lost, forever.
Open up MS Paint.
Hit EDIT > PASTE
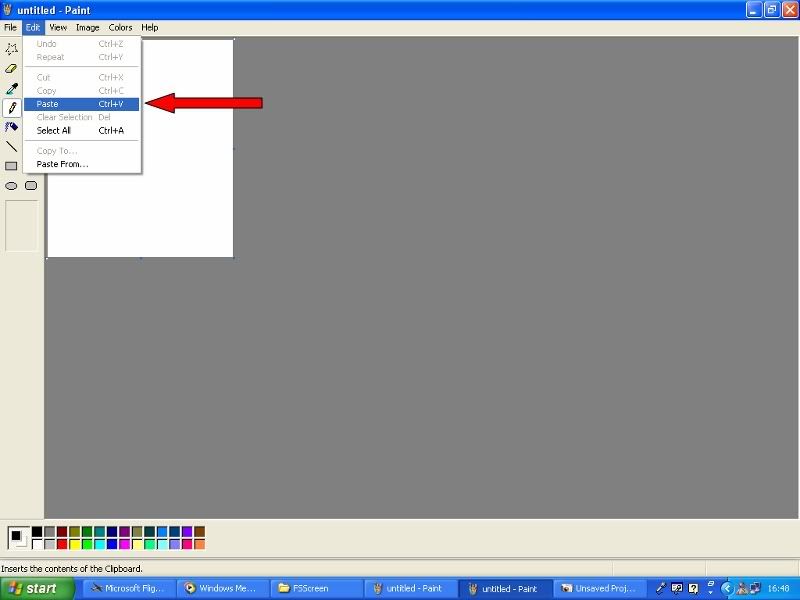
Your Image will appear, at the same resolution as your program runs at (in this example 1024x768)
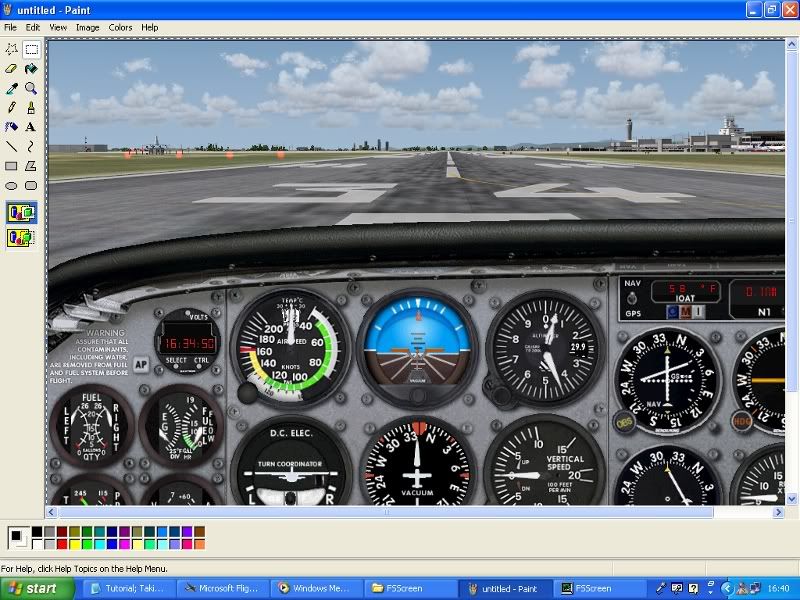
Select
SAVE AS. A box will popup, with information of where to save the file
to and a box below it where you can name the file whatever you like.
Below the name box there is a file type box. Select Jpeg. You can then
click SAVE

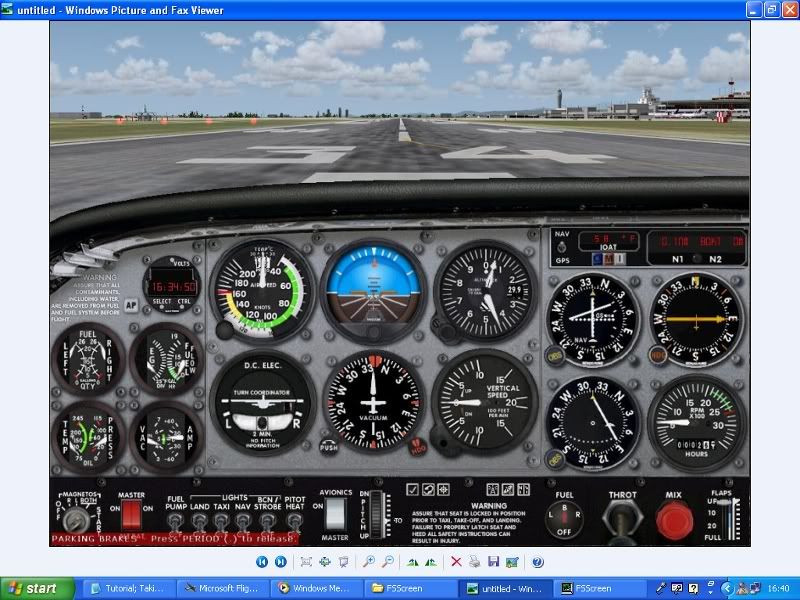
Wherever
you just save the image to, there will now be a hard copy of your
screenshot. As it was a Jpeg saved through Paint, it will not be of the
same quality as you originally see within flight sim. As I said, this
is a simple method.
If
you want the full image quality, you can save as other file types,
however this results in a larger file size, which although is not too
critical in personal use, will hinder you at a later stage. (When you
upload it to the website)
Now, this method is obviously very
clumsy, and with not the greatest result. You will have to pause FS,
minimise it, save the shot, and then go back into FS before you can
take another. Nobody wants to have to do this, and although my first
few sets of screenshots were done using this method, I certainly
wouldn’t go back to it.
So I downloaded a program called FS
Screen. What this does is run in the background (its tiny so will not
affect FS play in any way) and when you hit 'Print Screen' it saves the
image, in a raw BMP format to the folder that the FSScreen.exe file
itself sits in. You can hit Print Screen as many times as you want,
without pausing FS and you will always have the image on your computer.
Download it here: http://library.avsim.net/esearch.php?DLID=11768
(it says it’s for only early FS versions, but it can be used for
literally anything. Please not though that any copy and paste buttons
will not work if this is on.
After you have the raw bmp, you can
open it in a program like paint and re-save it as a jpeg to reduce file
size. Of course at this stage you can also do what I do, and play
around with it. I use a program by Microsoft, called Picture It! 10 to
save my images into a high quality Jpeg. I recommend you either use the
same of programs like Photoshop and Paint Shop Pro.
As I said I’m not going to go into detail about editing, but I thought I would point you in the right direction.
Other
programs for screenshots are available, although this is the one I
recommend, and is best for both all programs, and for editing it
afterwards.
Now the next step is to actually put it on the forum.
I
recommend a service called Photo bucket. Registration is free, and
although there are limits, they have ever hampered me. Go here: http://www.photobucket.com/ and get yourself an account.
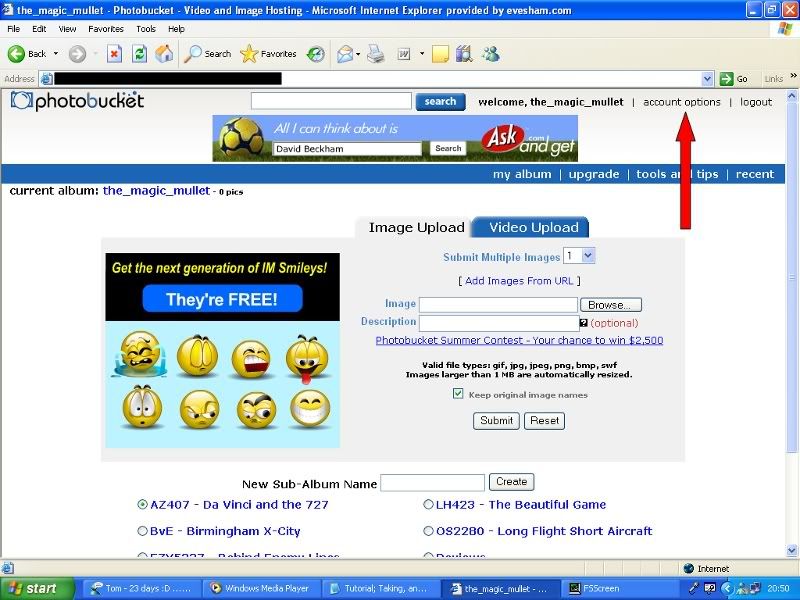
Once
registered you can enter your account. There is a very important
setting, which affects the size of your images after uploading. Click
on the 'Account Options' button, hidden away in the top right.
Photo
bucket will automatically resize images over a certain limit. Although
they will allow a maximum size of 1024k on a free account, it is not
necessarily set to this, and for a long time this caused my images,
despite being well under the limit, to be resized.
Remember
though, that the larger the image the longer it will take for other
users to load. For this reason I recommend setting yourself a limit.
Mine is 512k.

(Please note, certain details removed)
Here you can also access other options, which you might want to play with.
With
that done, you can start uploading images. You can set up an album if
you want, buy entering a name in the sub album box, and then clicking
on the newly created album, to open up the same window, only within
that album.
The page you are currently on is shown under the
blue bar in the top left. In this case you can see it is
the_magic_mullet and that is my homepage, but if I wanted to upload
something in the BvE page, I would click the BvE link and I would see a
similar page.
It sounds harder than it is. You will get the hang
of it. But if you do get it wrong, there are options to move it around.
Like the account options, you will have to play around.
Anyway,
to actually upload the image, go to the white box, hot browse, find
your saved file, and then hit upload. You can also upload multiple
images, by using the aptly named 'Submit multiple images' drop down.
This will allow you to upload up to 19 images at once.

Obviously
the larger the image, and the more you upload, will effect how long it
takes. Stay patient though, I have never had it lock up on me
*touchwood*
Once your images are uploaded, you will be notified,
and if you have your options set similar to mine, thumbnails of your
images will appear near the bottom of the page.
Under these
images will be several boxes. In this case, I have the direct link and
tag ready links set up. The account options menu will allow you to add
more boxes, however these are the only ones needed for most forums.
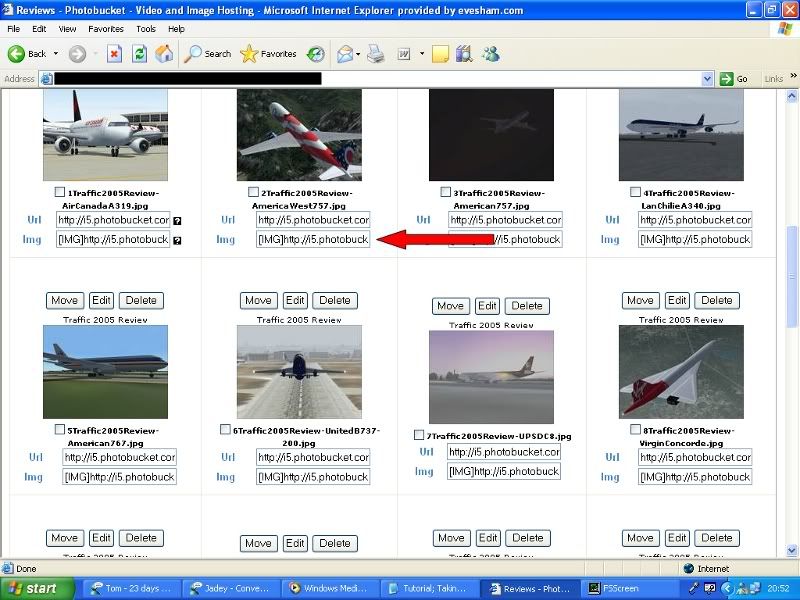
To
post on a forum, you need to code it. Photo bucket has this pre-made.
For Forums to display an image as an image, and not just a link, you
need to add tags, either end of the URL. (With the ending tag being
[/*IMG] - ignore '*')
Copy the IMG tag form the appropriate box on Photo Bucket, and paste it into the message window on the appropriate forum.

Now submit the message, and it should all display correctly.
Well,
I hope you have now found out that you are successfully posting images,
and sharing them with others. As I said, most of your progression is
now down to you playing around. As you might see me post, I have
progressed far beyond my simple images, to much sharper, clearer ones.
Screenshots,
and sharing them with others, is probably the part of the hobby I enjoy
most, and I hope this has introduced you to this wonderful world.
|
|
|


 Topic: Posting screenshots
 Tweet
Tweet


 Posting screenshots
 Topic Options